
Analyzing DNA, another perk of forensics
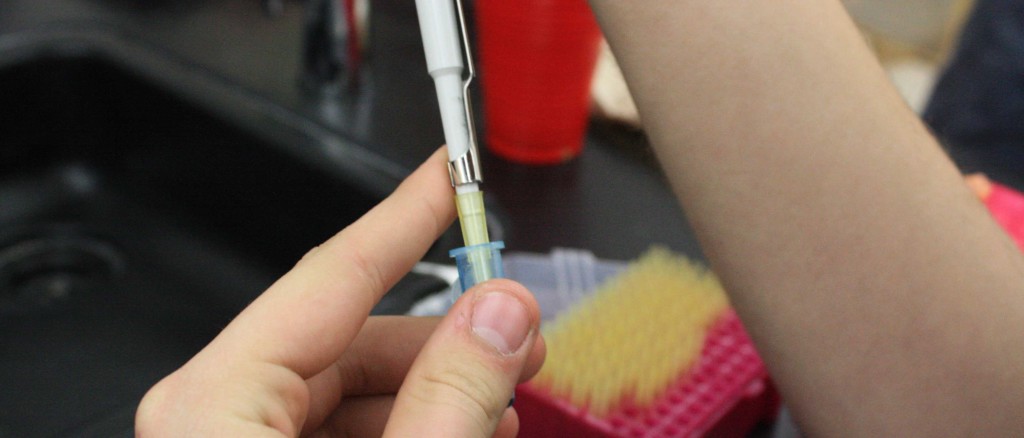
Erik Danielson takes in a DNA sample for analyzing on Dec. 15. Photo by KALEEN SINGH
Walking into class, the forensic students get the opportunity to try out a new thing that no other class on campus does, which is analyzing DNA.
DNA itself is an entire unit in the forensics class, because in the real world of forensics, DNA is exclusively vital to catching a criminal and identifying a victim, but it requires certain equipment that won’t be found on campus unless it is provided.
“The equipment we have for DNA analyzing is provided by UC Davis, this equipment is very expensive so we treat it as professional forensic scientists would.” Forensic teacher Laura Brun said.
First, students have to prepare their DNA and store it before conducting an analyzation. At this stage, Forensic and Chemistry teacher Mrs. Laura Brun demonstrates how to use the pipette. Pipettes are tools use to extract microliters of DNA. Students must practice how to use the pipette for it is important to know that the amount of pressure you push on the pipette determines whether it will gather or release any sample it takes. Once mastered, they can extract and measure the DNA, then they will store their samples when they are ready to analyze results. Erik Danielson explains what it was like handling a pipette.
“The pipettes are a fairly simple device, that just requires you to constantly keep it sterile, however it required a steady hand to use for when you’re trying to drop liquids. It’s also important now to insert the pipette the wrong way for it could contaminate the DNA,” Danielson said.
Once students get the feel for Pipettes and the DNA is prepared, they are ready to begin analyzing. Students need to prepare a mold to for the DNA to settle into and then place the mold in a box filled with saltwater that is hooked up to a machine that will release electrical currents into the water. They use a comb to mold out “holes” for the DNA to sit in, They can create this mold with a gel substance that dries into a solid in less than two minutes after being exposed to room temperature.Once the mold is created and placed into the water chamber, students will now exercise their knowledge on pipettes and carefully place the DNA into the holes. When the DNA is place, they can turn on the machine and patiently wait as electric currents run through, spreading out the DNA, as it is clumped together. When the DNA is spread out, students will be able to analyze and compare different DNA samples to find a match.
“The instructions given by Mrs. Brun were pretty straight forward for it is a step-by-step process, however it’s something you definitely need to pay attention to or else you could jeopardize your entire experiment by just little mistakes,” Danielson said.
The average classroom doesn’t exactly get that type of equipment to use, let alone work with DNA in that way. But besides using scientific equipment,but there’s something more important to take away from this forensic activity.
Danielson said, “The lab was a good learning experience, for it helped demonstrated the fact that forensic work requires a lot of very careful and exact calculations as well as proper care.”
by KALEEN SINGH


![On the stage, Daniel Bozinovski and Rachel Treto play their part as Tom and Hannah in the show “The Cast List”. The show was about a group of students who were told about their cast list for the play “Romeo and Juliet.” The Theater I students were in preparation for their first showcase of the year. Students went over their lines during all of their class for the past two months. “[We put in] a lot of rehearsal, practicing lines, making sure you have everything memorized and making sure you are ready to go in and not forget anything,” Nathan Weeks said. Photo by Megan Kubas.](https://www.whitneyupdate.com/wp-content/uploads/2024/05/IMG_4085-600x396.jpg)